Tuesday, 8 February 2022

Steps to Apply a Service Pack or Patch to Mirrored SQL Server Databases

 In this post, I am going to outline my environment and then walk through the process of patching mirrored servers.

My test environment consists of two SQL Server 2005 SP2 servers named SSQL1 (principal) and SSQL2 (mirror) that contain eleven mirrored databases. The database mirroring operating mode is set to asynchronous and I’m upgrading to SP4.

Here is a look at the two mirrored instances.


Step 1
Always backup all system and user databases before applying patches.

Step 2
Remote Desktop into the “Mirror” server (SSQL2 in our example) and download/copy the patch to the server.

Step 3
Stop all SQL Services on the “Mirror” server.

Step 4
Run the patch on the “Mirror” server.

Step 5
Once the patch is complete, reboot the “Mirror” server.

Step 6 (optional)
If your database mirroring is set to asynchronous (High Performance mode), we will need to synchronize the databases first. To do this we will need to issue the following statement for every database on the “Principal” server that is mirrored.

ALTER DATABASE databasename SET SAFETY FULL

Here are the commands for the 11 databases on my server.


Step 7
The databases might change to “synchronizing” while the transactions catch up. Once all of the databases show “synchronized”, as shown below, we can perform the manual failover.


We can perform the failover using the following statement on the principal server for each database:

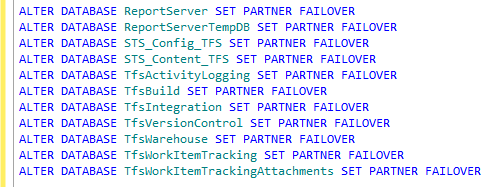
ALTER DATABASE databasename SET PARTNER FAILOVER

Here are the commands for the 11 databases on my server.


We can now see that the servers have switched roles.


Step 8 (optional)
Once the failover has taken place and all the databases have switched roles we can set the operating mode back to asynchronous using the following statement on the new principal server:

ALTER DATABASE databasename SET SAFETY OFF

Here are the commands for the 11 databases on my server.


Patch the New Mirror Server

Now that the roles have been swapped, we will patch our "new" mirror server (SSQL1 in our example).

Step 9
Remote Desktop into the "new" "Mirror" server (SSQL1 in our example) and download/copy the patch to the server.

Step 10
Stop all SQL Services.

Step 11
Run the patch on the server.

Step 12
Once the patch is complete, reboot the server (SSQL1).

Step 13
Upon reboot and login, make sure all databases come online clean and synchronized.

Step 14
You now have two choices, leave the databases alone and leave SSQL2 as the principal and SSQL1 as the mirror or you can fail back to return the environment back to how it was from the beginning.

Step 15 (optional)
If you want to failback again follow these steps.

If you are using asynchronous mode issue this statement for each database:

ALTER DATABASE databasename SET SAFETY FULL

Once the databases are synchronized then run this statement for each database:

ALTER DATABASE databasename SET PARTNER FAILOVER

If you need to turn the asynchronous mode on again run this statement for each database:

ALTER DATABASE databasename SET SAFETY OFF

Here is an example of the commands to run on both servers.


Wednesday, 27 February 2019

Partitioning a table using the SQL Server Management Studio Partitioning wizard

SQL Server 2008 introduced a table partitioning wizard in SQL Server Management Studio.
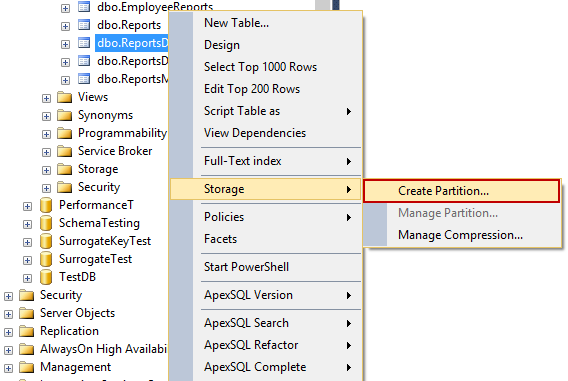
Right click on a table in the Object Explorer pane and in the Storage context menu choose the Create Partition command:

Choosing the Create Partition command
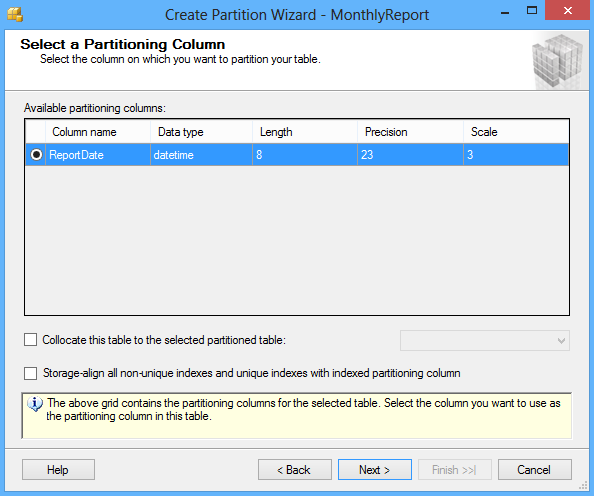
In the Select a Partitioning Column window, select a column which will be used to partition a table from available partitioning columns:

Select a Partitioning Column window
Other options in the Create Partition Wizard dialog include the Collocate this table to the selected partition table option used to display related data to join with the partitioned column and the Storage Align Non Unique Indexes and Unique Indexes with an Indexed Partition Column option that aligns all indexes of the partitioned table with the same partition scheme.
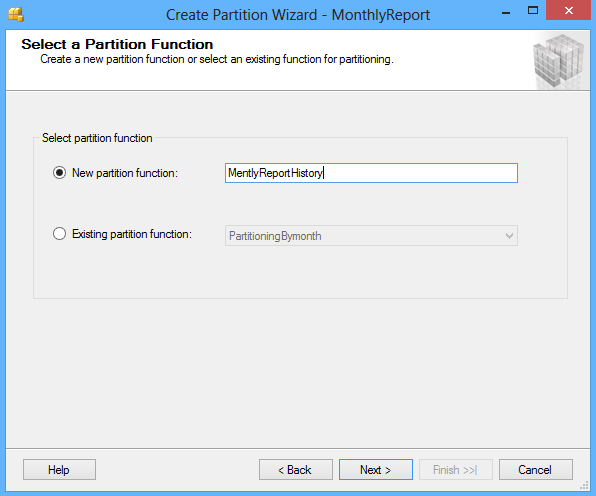
After selecting a column for partitioning click the Next button. In the Select a Partition Function window enter the name of a partition function to map the rows of the table or index into partitions based on the values of the ReportDate column, or choose the existing partition function:

Select a Partition Function window
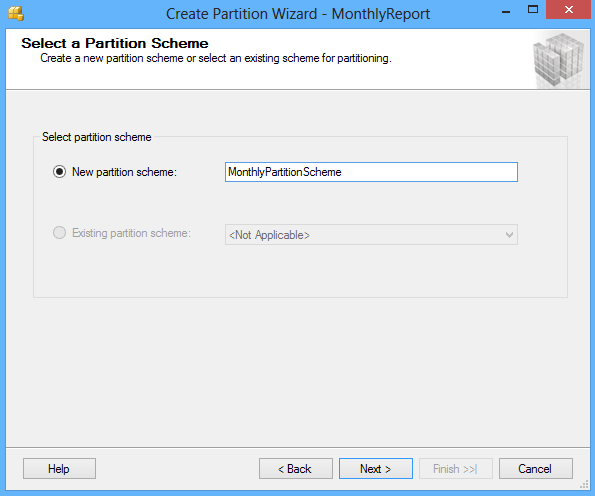
Click the Next button and in the Select a Partition Scheme window create the partition scheme to map the partitions of the MonthlyReport table to different filegroups:

Select a Partition Scheme window
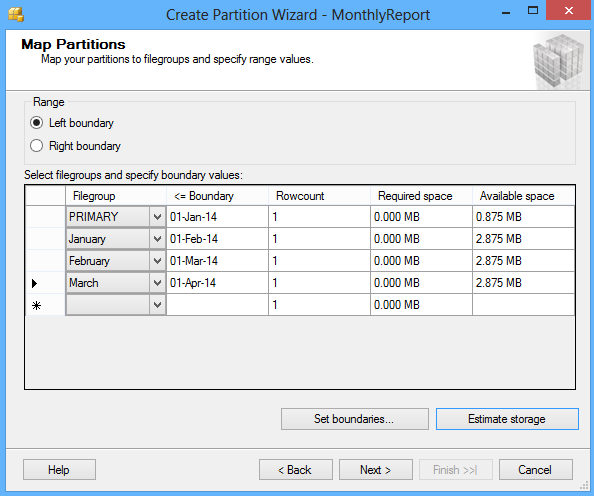
Click the Next button and in the Map Partitions window choose the rage of partitioning and select the available filegroups and the range boundary. The Left boundary is based on Value <= Boundary and the Right boundary is based on Value < Boundary.

Map Partitions window
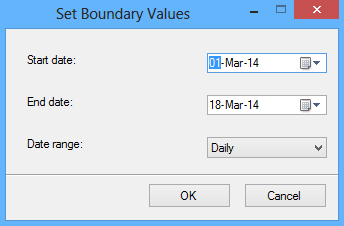
By clicking the Set boundaries button you can customize the date range and set the start and the end date for each partition:

Customizing date range and setting start and end date for each partition
The Estimate storage option determines the Rowcount, the Required space, and the Available space columns that displays an estimate on required space and available space based on number of records in the table.
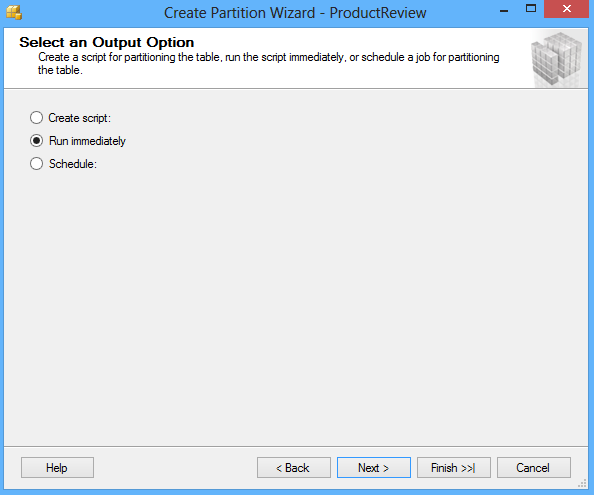
The next screen of the wizard offers to choose the option to whether to execute the script immediately by the wizard to create objects and a partition table, or to create a script and save it. A schedule for executing the script to perform the operations automatically can also be specified:

Select an output option window
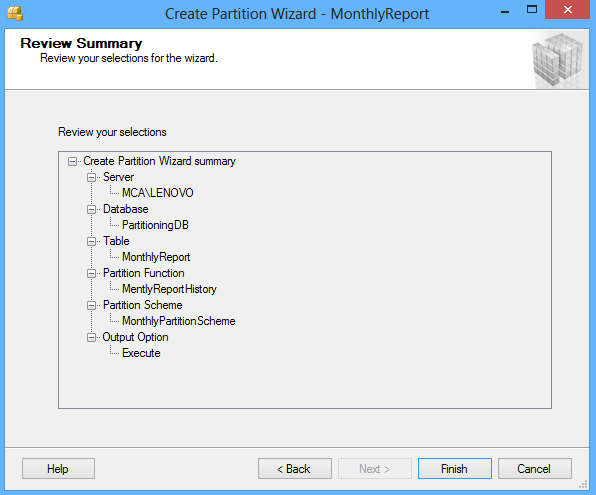
The next screen of the wizard shows a review of selections made in the wizard:

Review summary window
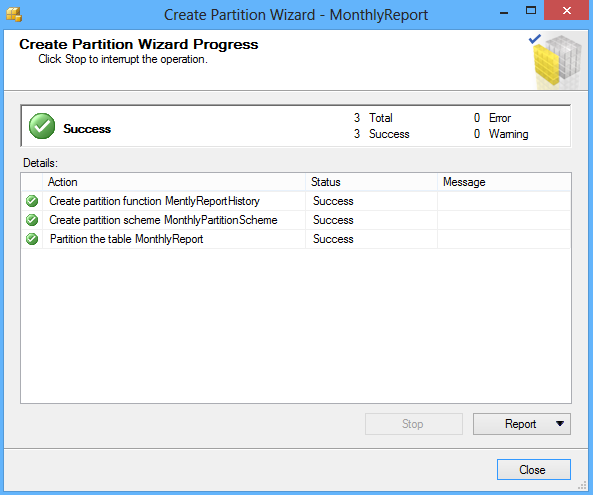
Click the Finish button to complete the process:
Create Partition Wizard Progress window

Horizontal Partitioning a table using Queries

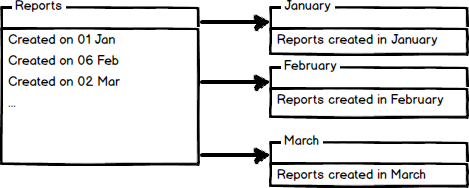
Horizontal partitioning divides a table into multiple tables that contain the same number of columns, but fewer rows. For example, if a table contains a large number of rows that represent monthly reports it could be partitioned horizontally into tables by years, with each table representing all monthly reports for a specific year. This way queries requiring data for a specific year will only reference the appropriate table. Tables should be partitioned in a way that queries reference as few tables as possible.

Horizontal table partitioning
Tables are horizontally partitioned based on a column which will be used for partitioning and the ranges associated to each partition. Partitioning column is usually a datetime column but all data types that are valid for use as index columns can be used as a partitioning column, except a timestamp column. The ntext, text, image, xml, varchar(max), nvarchar(max), or varbinary(max), Microsoft .NET Framework common language runtime (CLR) user-defined type, and alias data type columns cannot be specified.
There are two different approaches we could use to accomplish table partitioning. The first is to create a new partitioned table and then simply copy the data from your existing table into the new table and do a table rename. The second approach is to partition an existing table by rebuilding or creating a clustered index on the table.

An example of horizontal partitioning with creating a new partitioned table

SQL Server 2005 introduced a built-in partitioning feature to horizontally partition a table with up to 1000 partitions in SQL Server 2008, and 15000 partitions in SQL Server 2012, and the data placement is handled automatically by SQL Server. This feature is available only in the Enterprise Edition of SQL Server.
To create a partitioned table for storing monthly reports we will first create additional filegroups. A filegroup is a logical storage unit. Every database has a primary filegroup that contains the primary data file (.mdf). An additional, user-defined, filegrups can be created to contain secondary files (.ndf). We will create 12 filegroups for every month:

To check created and available file groups in the current database run the following query:
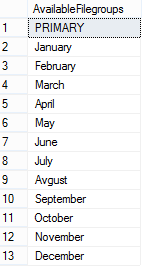
Available file groups
When filegrups are created we will add .ndf file to every filegroup:


The same way files to all created filegroups with specifying the logical name of the file and the operating system (physical) file name for each filegroup e.g.:
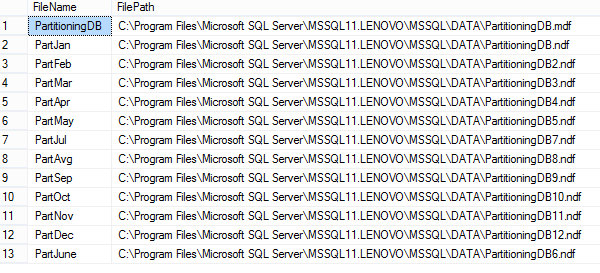
To check files created added to the filegroups run the following query:

 
Dialog showing name and path for files created added to the filegroups
After creating additional filegroups for storing data we’ll create a partition function. A partition function is a function that maps the rows of a partitioned table into partitions based on the values of a partitioning column. In this example we will create a partitioning function that partitions a table into 12 partitions, one for each month of a year’s worth of values in a datetime column:
To map the partitions of a partitioned table to filegroups and determine the number and domain of the partitions of a partitioned table we will create a partition scheme:


Now we’re going to create the table using the PartitionBymonth partition scheme, and fill it with the test data:


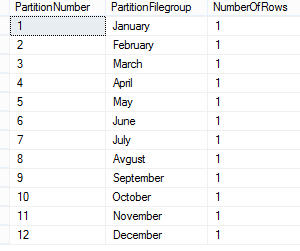
We will now verify the rows in the different partitions:
Verifing rows in the different partitions
Now just copy data from your table and rename a partitioned table.